I have been using WSL for some time now, and with it Ubuntu on my Windows machine, but since I switched to WSL2, the startup time has increased from "instant" to 10 seconds.
It wouldn't let me reset it to WSL1, so if I'm going to reinstall WSL for this anyway, I'll see what other distributions are available besides Ubuntu. Because there are.
If you've been reading my blog for a long time, you've probably seen me mention that I'm using Windows 10 LTSC. This has many advantages (and disadvantages), I don't intend to go into them in this article.
One of those disadvantages (for some, for me it's an advantage) is that it doesn't have a Microsoft Store. And if you want to use a distribution other than the default Ubuntu, you will need it. Right? No.
So why did I choose Debian?
For one thing, all my servers are running Debian (including Raspberry Pi), so it's handy.
Secondly, because of its size. If you look at the size in the MS Store linked above, you can currently see that Ubuntu will download 608MB, while Debian requires only 93.5MB. That is a significant difference.Used storage after the installation with Ubuntu:
Meanwhile the Debian uses: Both configured the same way.
The installation of Debian is relatively simple, but it's hard to find how to do it without the MS Store. That is one of the reasons for this article :)
Let's get started!
Open a CMD, but with a normal user, no admin rights required.
Set WSL1 as a default: wsl.exe --set-default-version 1
List all available distributions: wsl.exe --list --online
If you want to install Debian, do so: wsl.exe --install -d Debian
Set up your new user by entering your username (in lower case only!) and password twice.
You're in the Debian. Great! You're almost done.
Update your system by running: sudo apt update && sudo apt upgrade -y
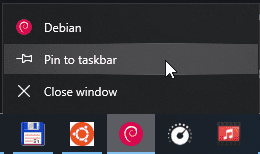
Remember to pin the icon to the taskbar:
If you'd like to check the list of installed distributions, run this command in CMD: wsl.exe -l -v
Extra settings
From now on I will only write down what was important for me to get a usable system. You can use the system without these, but if you want to SSH to another machine from here, they will speed things up considerably.
I don't want to write an article on SSH config, there are good sites for that, e.g. this one. However, to get the TAB autocomplete to work, you need to put these up: sudo apt install openssh-client bash-completion
To use sudo without password, the /etc/sudoers file must be edited: sudo nano /etc/sudoers And replace the line starting with "%sudo" with this: %sudo ALL=(ALL) NOPASSWD:ALL
Use "magic" command as an ultimate updater, and add date to the history by editing nano /etc/bash.bashrc add to the bottom: alias magic='sudo apt update && sudo apt dist-upgrade --autoremove -y' HISTTIMEFORMAT="%Y-%m-%d %T "
I like to scripting in ksh, so install it: sudo apt install ksh
And I also use these tools: sudo apt install curl wget
The systemd enabled by default. However, since I don't use it, I disabled it to save resources: sudo nano /etc/wsl.conf


Comments