
How to use PuTTY? Short tutorial and tricks
PuTTY is used to (most often) connect to the Linux server via SSH from the Windows client. If you have just started using DigitalOcean, PuTTY will be your friend.
Let's get started!
- Download PuTTY (Note: putty.exe is a portable version - I recommend to use this one)
- Open the putty.exe file
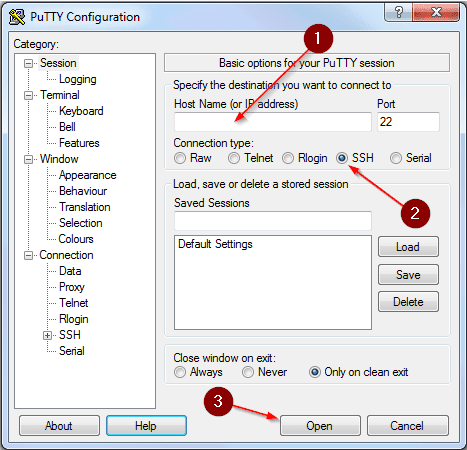
- Type the server's IP or hostname (Step #1), select SSH (Step #2), and click to Open (Step #3)
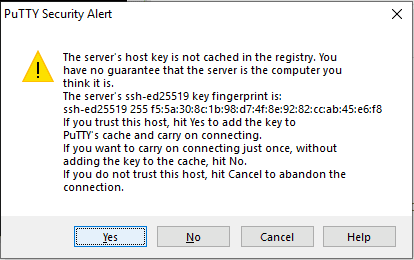
- Accept the new connection (you need to accept it only first time)
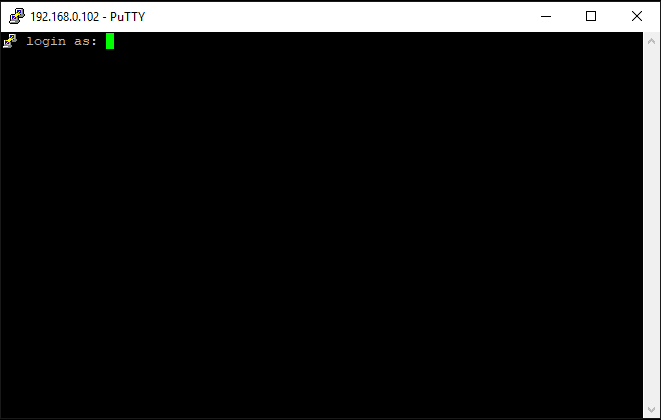
- Type here your username (probably "root"), press enter, and type your password (right-click inserts it immediately from the clipboard)
- That's all! You're logged in to the server. Great job!
Tips and Tricks
- Feel free to use the clipboard. Press right-click in the terminal window and it will immediately insert the content
- Save your login name and type only the password
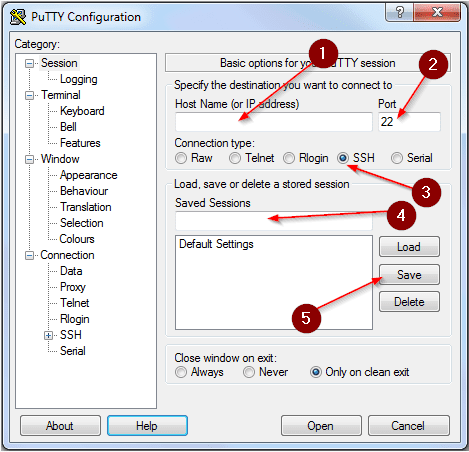
Enter username@myhostname instead of myhostname - Save periodically used sessions
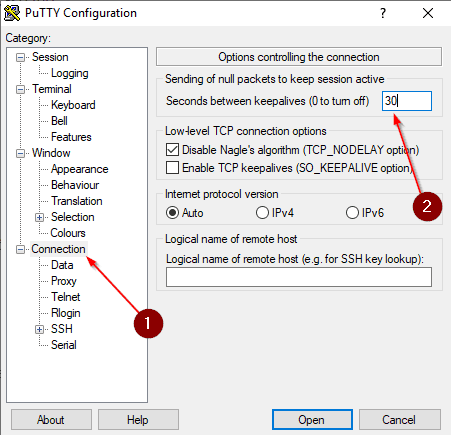
Fill Steps #1, #2, #3 and #4, then click on the Save button at Step #5 - Use KeepAlive to preventing disconnect periodically
Note: You have to do that for every connection - Create the backup
Export all PuTTY sessions by running this command in cmd as Admin
regedit /e "%USERPROFILE%\Desktop\putty.reg" HKEY_CURRENT_USER\Software\SimonTatham
It will export all session to the Desktop.
Click here to learn how to automate this process - Restore the backup
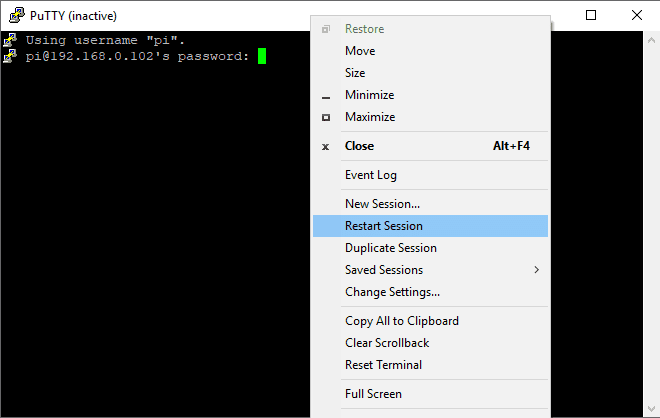
Open the "putty.reg" file and add to Registry Database - Use Restart session instead of close the window and open it again. Press right-click on the Title bar and select Restart session
- That's all.
If you found this article useful and would like to show your appreciation, please consider making a small donation via PayPal. Your support will allow me to continue creating valuable content and make my blog even better. Thank you for your contribution!








Comments